
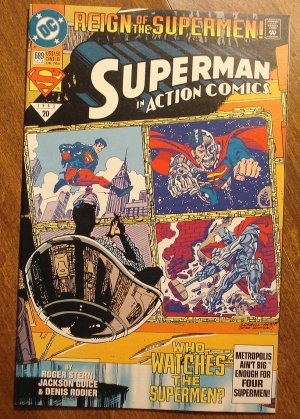
Characters are based on Action Comics # 689. One of my first comics. Naglalaro sa 6 or 7 years old ako noon nung pinabili ko to sa tatay ko. Nahanap ko dati sa book section ng South supermarket dito sa Valenzuela. Marami pa kong nabili doon eh, Wolverine flashback, Brian Bolland cover ng The Flash, etc. I miss that place.
Step 1: Let's start with the sketch. Medyo marumi tignan. (may math pa sa baba) Focusing on the layout, importante na isipin kung paano dadaloy sa mata ng viewers yung arrangement ng characters.

I had a problem with Steel's hammer. It might exceed the border but anyway, we'll find out when I start working on the pencils.
Step 2: For penciling, I'm using Faber Castell 0.7 mechanical pencil, blue lead. (madalas sa 0.7 size lang available yung colored leads) Eh bahala ka na kung anong brand gusto mo. Bakit mas maganda nag mech pencil kesa regular pencils?...mas mayabang kasi ang dating pag yun ang gamit mo. hehe jowk. First of all, Name-maintain yung tulis ng lapis. And it saves time than sharpening your mongol again and again. The only disadvantage I think is when using mech pencils for artworks with lots of shading. Aksaya rin sa oras, like what I did in the shaded parts of Eradicator's suit. After I finalized the "blues", papatungan ko na siya ng standard lead, like what's on the scanned image below. (May hati sa gitna kasi a4 size lang ung scanner ko. Beggar! haha.)

Notice some changes. Hindi na naka-jacket si Superboy. And I adjusted Steel's pose to avoid too much blank spaces. Ang nakakainis lang siguro is hindi na exaggerated yung poses kesa doon sa sketch but I'm always like that so bayaan niyo na. hehe.
After scanning my work, all I need to do is to remove the blues in photoshop. Here's how:
a) Image - Adjustments - Selective color.

Make sure that you're working on "Blues". Then, adjust the "Black" to -100. Do the same on"Cyans".
We are doing this to remove unnecessary dots hiding from the color blue.
b) Image - Adjustments - Hue/Saturation

Again, ilagay ang tab sa "blues" and adjust the lightness to 100%. Same thing sa "Cyans".

Nawala na yung blue lines. Pero lumabo no?
c) After desaturating (Shift + Ctrl + u), click Image - Adjustments - Levels

Picture says it all. Trial in error mode ito eh. I usually adjust the white and midtone sliders consecutively.
For my work, it ended up like this:

Try using Brightness/ Contrast tool or Burn/Dodge tool for minor adjustments and BAM!
This is now ready to ink! Hope you enjoyed the tutorial(?). Happy penciling!
This is now ready to ink! Hope you enjoyed the tutorial(?). Happy penciling!
No comments:
Post a Comment